Don’t miss out!
Get the latest resources sent directly to your inbox.
Service
Default job can be set up to allow speedier work order creation.
A routine was developed to allow a Default job to be automatically inserted in a new Work Order created in Update Work Orders. This could speed up check-ins to the Service Department at high volume time periods.
This new feature is only available in G2.
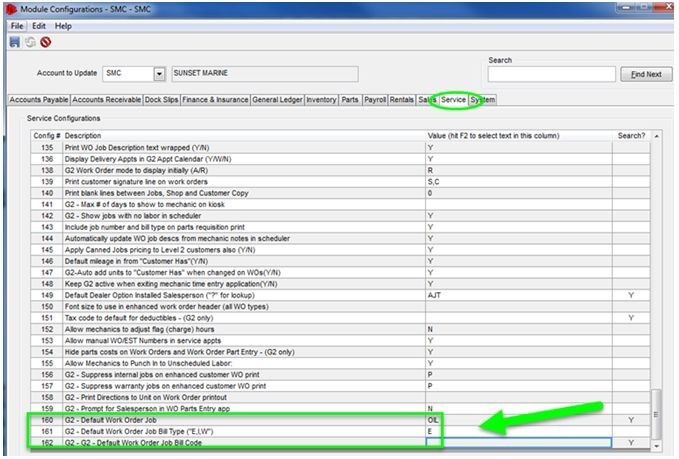
To Set Up a Default Job which activates the Default Button in Update Work Orders, user will need to sign into G2. Once in G2, select G2 Admin> Setup> Update Module Configurations, left-click on the Service tab.
Config# 160 must contain a Canned Job (this is the key to activating the Default Job feature.
Config# 161 must contain ”E” for External, “I” for Internal or “W” for Warranty.
Config# 162 must contain an Internal Bill Code (if Config# 161 was set to “I”) or Warranty Customer # (if Config# 161 was set to “W”).
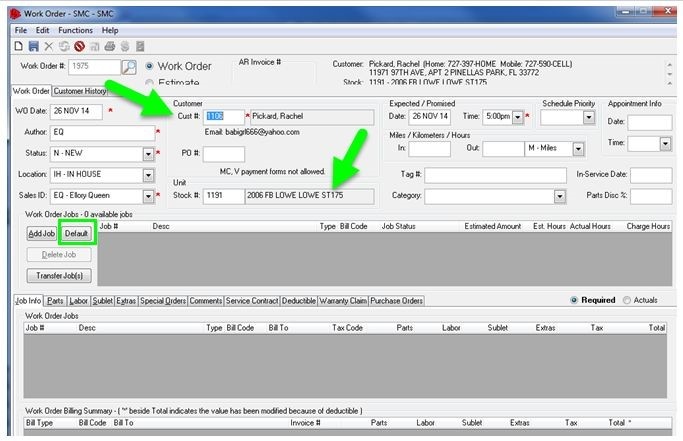
Then in G2 Service> Work Orders> Update Work Orders, create a new Work order by left-clicking on the New icon, fill in the required fields, and then click on the Default button to the right of the Add Job button.
Clicking on the Default Button will load all information associated with the Canned Job, including any Estimated Required Labor, Required Parts, Required Extras, and Required Sublet that were set up.
Get the latest resources sent directly to your inbox.